
History
I needed to create bulk Email Subscription on my SQL Server ReportsServices (SSRS 2012) so I could do multiple subscription to the same report for SCCM 2012 R2 (System Center Configuration Manager) for email recipients in multiple time zones and each requiring a different parameter value. I did not want to do this manually as I had 4 reports that needed these subscriptions with 64 email recipients in 10 time zones and each recipient requiring a specific parameter value. I also did not want this restricted to use by SCCM so this tool can be run for almost any report. This is a reoccurring activity for me so to save some work, I ended up writing a application to make it happen. I am calling it "SSRS Bulk Email Subscription Tool".
This tool is run from a workstation and does not have to be the SSRS server and probably should not be.
System Requirements:
- Microsoft.Net Framework 4.5 or later
- Microsoft Excel 2010 (14) or later
- SQL Server Reporting Services 2012 (2008 R2 might work, I have not tested so no guarantees)
Using the Tool
Originally you needed to create a CSV file to work with it for the EMAIL list, that requirement has been removed, now it does it all in Excel and creates a template customized to you report.
Tool can be downloaded HERE
Using the SSRS Bulk Email Subscription Tool
Settings
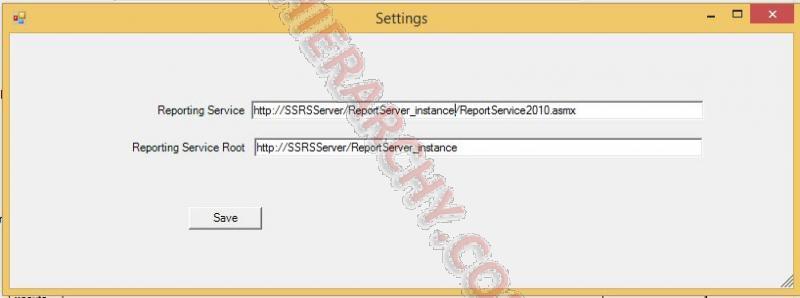
The first time you open the tool, you will be prompted to set the Reporting Server Service URL and Root URL. You can always change this by clicking the settings button on the main screen.
- Reporting Service: The Reporting Service url tells the server how to find the ReportService2010.asmx file. If the SSRS instance is the default then you do it in the "http://SSRSServer/ReportServer/ReportService2010.asmx" format, but if it is not the default instance do it in this format "http://SSRSServer/ReportServer_instance/ReportService2010.asmx"
- Reporting Service Root is the root folder of your reporting server. this should normally be "http://SSRSServer/ReportServer" for a default instance or "http://SSRSServer/ReportServer_instance" if it is not.
Main Screen
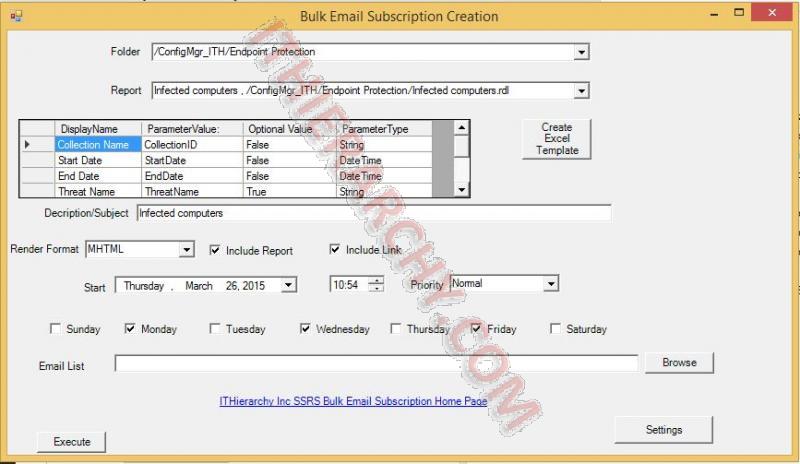
- Folder dropdown: You can filter the reports by the Folder drop down. This dropdown gets populated with all of the folders on your Report Server instance, then filters the Report dropdown based on what is selected here. if nothing is selected, the Report field will show all reports on the server.
- Report dropdown: Here is where you select the report used by your subscription. Once this is selected you will automatically populate the table below it with the required and optional Parameters.
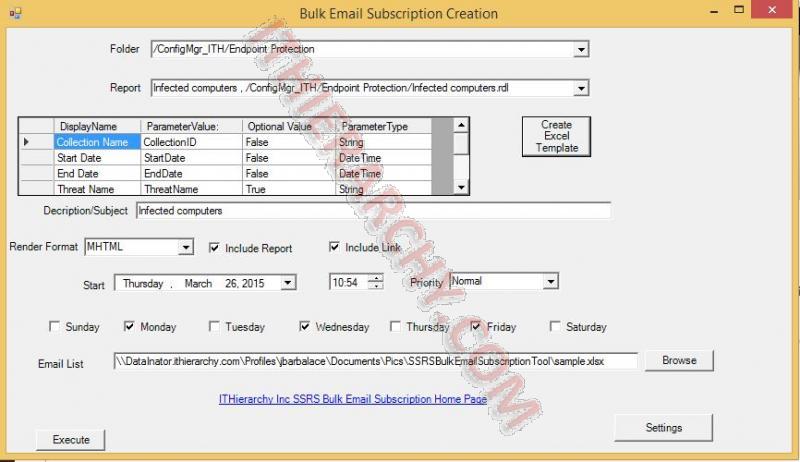
- "Create Excel Template" button: this will create and open a template in Excel and puts the path and name of the file created in the Email List field automatically.
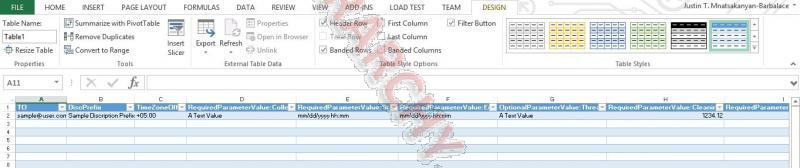
- Line 1 Shows the Parameter headings and should not be changed
- "TO" which is the email address of the receiver.
- "TimeZoneOffset" which is the UTC Time zone for the receiver. You can get the time zone offsets at (http://www.timeanddate.com/time/map/).
- "DiscPrefix" which is what is shown BEFORE the report name in the Subject, description, and comments in the email. While this column is needed you can leave them blank.
-
OptionalParameterValue columns are used to identify report parameters that are not required but availible to be set to be passed to the report server. Each column heading is done in the form of "OptionalParameter:<ParameterName>"
-
RequiredParameterValue columns are used to identify report parameters that are Required to be set to successfully create the subscription on the report server. Each column heading is done in the form of "RequredParameter:<ParameterName>"
-
Line 2 shows a sample of data the should be entered. This line should be changed to have real values.
- Line 1 Shows the Parameter headings and should not be changed
- Render format: select the format you want it to be sent in:
- The MHTML,HTML 3.2, and HTML 4.0 will embed the reports in the email
- the other formats attach it to the report in the selected format
- Start: select the date that this report will become active and the time the report will be emailed. This time is adjusted Time Zone offset you set in the <Name>.xlsx you generated. If you want the report to be emailed at 13:40 every day, the time zone offset will adjust this so the person receiving the report is scheduled to get it at 13:40 their time.
- Sunday-Saturday checkboxes: Select the days you want this report sent
- Email List: Browse to the CSV file that is your email list.
- Settings: allows you to update the Report Server settings
- Execute: executes the creation of the Report subscriptions with the settings you have selected.
We hope this helps you and you find this useful.
Download the Tool:
Tool can be downloaded HERE
Comments